Showing posts with label Drawing Process. Show all posts

Tuesday, October 24, 2017

Books are coming

I expect the "Book of Drawings" to arrive soon then straight out the door. Tell you what it has been a process to say the least, I learned many things.
If you missed the chance at Kickstarter you can get a book here: Davemalan.com/store


Tuesday, June 27, 2017

Book of Drawings


A book of my drawings is out an available for purchase on Kickstarter.
Check it out here: DaveMalan.com/store

Tuesday, June 20, 2017

Book of Drawings coming soon!

Hi blogger friends. Like the neighborhood I grew up in. Still makes me nostalgic to come back to where it all began, a simpler time of posting art and thoughts for others to come by and interact at a slower pace.


Alas, the world has changed and I apologize for not sharing my latest work over here. Let me know if there are still visitors and I'll make an extra effort. Regardless I wanted to share my upcoming project. I'm going to launch a Kickstarter campaign next Tuesday June 27th. The time has finally come to compile my best drawings into a book with good high quality prints for anyone who would like one. Please come on over, I'll post when I launch, but you can get a heads up by signing up for my mail list at DaveMalan.com. There will be some early bird discounts and a few originals you won't want to miss.

Wednesday, June 29, 2016

A uick drawing video!

30 minutes squeezed into 145 seconds. This is my process, I always work general to specific start with the biggest broadest shapes and just get something down on the page then react to it. From the start I could tell the proportions weren't right so I had to cut back on the left cheek a couple times and slide the edge of the mouth to the right. Getting some hatching in there allows me to get a better feeling by getting more accurate weight. If you just outline the eyeballs you are missing some of the weight the eye has and throwing your drawing off.
I am really happy with the final result after the rocky start.

Thursday, August 20, 2015

Cosmonaut


The latest illustration has a little different style. I've been pushing to let my line work stand out more. I had a feeling the fully rendered style I have been using had a really overworked feeling to it. I think the lines keep it more fresh and overall it is faster. Below you can see a lineup showing the steps to get there. First a rough with pencil and paper, then i move to digital making that really light and tracing over it while adding a rough digital drawing fleshing out much of the detail. Then a second pass again tracing the last but with clean finish lines, then the color work.


Tuesday, July 15, 2014

Finally, a process video

At long last, after many requests I've finally found the initiative to post a process video. Its rough but here it is. 


This shows about 12 minutes of drawing compressed down to 90 seconds. Done in Photoshop but the principle is no different then working in my sketchbook.

The most important rule is to start out as general as possible. I start with a really rough circle just to lay out a starting shape/size. The circle becomes obsolete in no time but it served it's purpose. Then it's the big shapes, in this case the face and the hair. Next a quick center line and a nose, mouth and eye line. From there building it in with short geometric lines always following the general to specific rule. I do all this work with lighter lines and a softer touch so they are easy to remove as more solid lines are placed (particularly when working on paper).

People like my crosshatching finish work but this is the most important step to the drawing, getting the structure correct. Feeling confident with your foundation allows you to be bold with your polish work.
Hope that helps. Feel free to ask any questions and look out for more steps soon.


Monday, August 08, 2011

Figure drawing steps

Finally got a few step-by-step pictures from a drawing session. Please excuse the awful quality, I love my little phone but its been scratched up, shaken, soaked, etc for a few years now.

Step #1-
Blocking in of the general shapes along with working out the spacing on the page and composition. Done with a Nu-pastel which is soft and easy to erase. I keep it light so mistakes are easy to fix. Measuring is important at this point. Get something on the paper that you can judge.

Step #2-
Still with the Nu-pastel I refine my shapes and work out the edges.

Step #3-
Once I feel like I'm close I go through and outline with Conte. Outline all the features and any hard edged shadows. I like this because the Conte is much harder and hard to erase so I can put in some heavy values and wipe with a paper towel and the line work will stay. Be very careful with small details like the eyes because like I said it is hard to erase if you are wrong, make sure you are right before you use the Conte.

Step #4-
So I've got the drawing lines, I go back to the Nu-pastel and color in all the shadows and the dark areas then wipe it down, go a little overboard with this. Next I come back with a kneaded eraser and start pulling out the light areas with a pink eraser available for the sharp clean edges. Then I return to adding darker values but more limited way and brighten the highlights as they get toned down.

Step #5-
Details. I've got a sharpened Conte piece that I use for the sharp tiny lines and places I really want to give strong darks.

Monday, August 23, 2010

Exercise

I've talked about this drawing exercise before, but I am so convinced it is great practice I will share it again. It comes from the great 
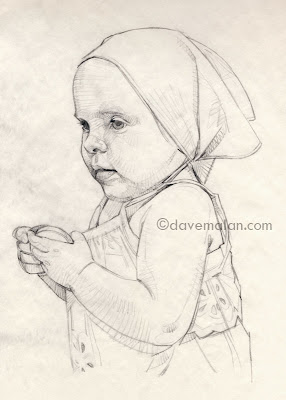
William Whitaker so it can be trusted. Note, this is not how I learned to draw but it would have saved me a lot of time on the journey. I've included some examples below.

step #1 - Get a pad of tracing paper. Set it up on an easel or whatever, close to a photo/model that you want to draw.
step #2 - Draw the subject. Try to do as much measuring as you can. Measure the distance between features with a straight object. Stand at least arms length, close an eye, hold your arm straight and use the end of the pencil and your finger (this is a useful technique for life drawing too). You'll get something fairly rough.

step #3 - Now step back and squint you should be able to see some structural problems. Tear off the drawing and put it underneath the next page and trace only the correct lines. Next, pull away the drawing #1.
step #4 - Now you've cleaned out a bunch of messy measurement lines. With the new simplified lines as a base, re-draw the subject. You should get closer this time around. Continue to step back and squint to find all the problems.

step #5 - Repeat 4-5 times.

Now this is never intended to be a nice finished drawing and it's not beautiful, but it should help get you closer and closer to accuracy with each iteration, you can transfer it to good paper and do a nice drawing or use it for a painting.
You are learning to see. Most people can handle a pencil just fine but seeing where a line should be is much more difficult and takes a lot of practice. Another very important trick for drawing is putting a line down. It doesn't have to be right just put something there and you can then use that line as a fixed point to decide it you are too low/high/long/short/left/right.

This is the basic measuring process I use for every drawing but all together at once on one page and without the tracing paper. This method is just a good way to break it down and take a more analytical approach which helps with learning and makes problems more apparent.