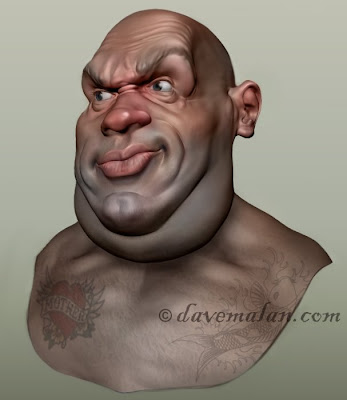
 And just in time for the governments scheduled conversion to digital! The textured version of the below model.
Sorry to visitors that are not interested in 3D modeling.
A refrigerator for my Artwork.
 And just in time for the governments scheduled conversion to digital! The textured version of the below model.
 I was hoping to post a new oil painting but here is a sculpture based off of a painting I did a little while back, which you can find here. I would love to do a sculpture in clay and actually bronze the thing. This one would be nice to have on my desk.


 I did this model while experimenting in Mudbox. It was modeled in a flat gray but I wanted to see what it would look like colored and got a little carried away. So this is a full painting done entirely in overlays over the rendering. He definitely looks like a pirate so I was inspired to give him tattoos, the mother one is cool but you can't leave him without a Koi fish. I'm sure all pirates had at least one Koi fish tattoo, it was practically a ticket onto the boat.
 So here is more of the meat of the painting after a day or two of drying time. Again kind of a rougher process then usual but I've enjoyed the more straight forward approach. Similar to my drawing style the face is were I like working, I like the challenge, and the background is more of an afterthought. That's why with this of any other painting the face is done first.
 I found this cool picture of an art critic, started a painting a while back then never really got back to finish but the face is nice.
 So this is step #3 in this painting. If I remember correctly I was in a hurry to get painting so a rushed value under drawing, a quick spray fix, wait 5 minutes and time to paint. I slapped on a burnt umber thin layer with turpentine to thin and painted into it with no medium except more turpentine if needed. That explains the dark colors because anything you paint picks up about as much Burnt Umber as it adds new color. I used a lot of quick loose strokes to get the face and was very proud of it when I was done, only to return the next day to be disappointed (was obviously staring at it too long). I did like the way the brush work looked but not the details of the drawing, no matter there are more steps to come.