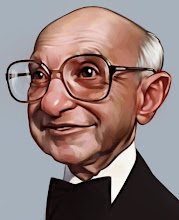
 Finally got a few step-by-step pictures from a drawing session. Please excuse the awful quality, I love my little phone but its been scratched up, shaken, soaked, etc for a few years now.
Step #1-
Blocking in of the general shapes along with working out the spacing on the page and composition. Done with a Nu-pastel which is soft and easy to erase. I keep it light so mistakes are easy to fix. Measuring is important at this point. Get something on the paper that you can judge.
Step #2-
Still with the Nu-pastel I refine my shapes and work out the edges.
Step #3-
Once I feel like I'm close I go through and outline with Conte. Outline all the features and any hard edged shadows. I like this because the Conte is much harder and hard to erase so I can put in some heavy values and wipe with a paper towel and the line work will stay. Be very careful with small details like the eyes because like I said it is hard to erase if you are wrong, make sure you are right before you use the Conte.
Step #4-
So I've got the drawing lines, I go back to the Nu-pastel and color in all the shadows and the dark areas then wipe it down, go a little overboard with this. Next I come back with a kneaded eraser and start pulling out the light areas with a pink eraser available for the sharp clean edges. Then I return to adding darker values but more limited way and brighten the highlights as they get toned down.
Step #5-
Details. I've got a sharpened Conte piece that I use for the sharp tiny lines and places I really want to give strong darks.


3 comments:
I missed the part where you get really awesome at drawing....
Thanks for posting, this is good info!
Thank you so much for posting this! I find all of your drawings tremendously instructive already, but the step-by-step provides even more info that is much appreciated. If you have the time you should consider writing a figure drawing book, I'd certainly buy it!
Post a Comment